Healthy Lunch Vegetable Sushi Rolls
Highlighted under: Light & Balanced
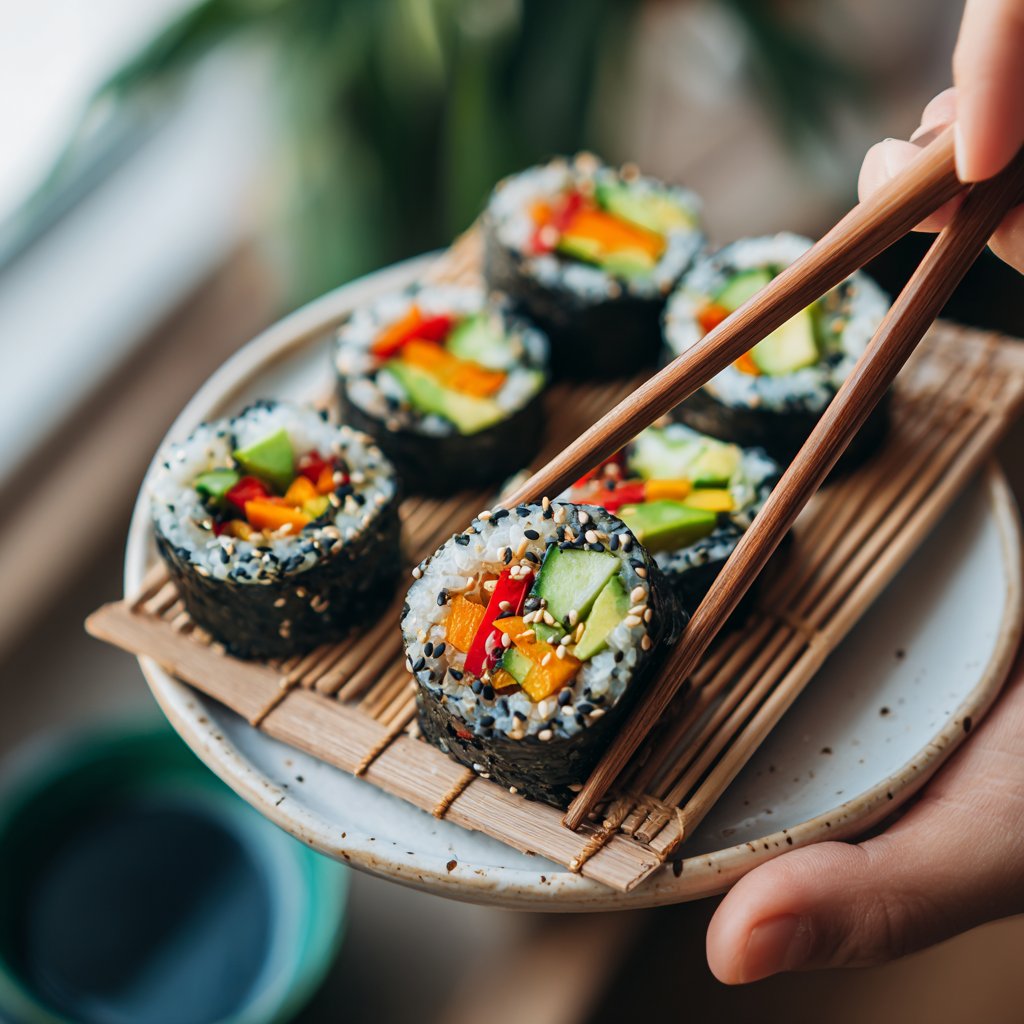
I absolutely love making these Healthy Lunch Vegetable Sushi Rolls! They are not just delicious, but also packed with fresh veggies that bring a burst of flavor in every bite. Making sushi at home was initially intimidating, but I quickly discovered that it’s quite simple and a fun activity. I enjoy customizing my rolls with whatever vegetables I have on hand, making it a versatile recipe suitable for lunch or a light dinner. Plus, the bright colors of the vegetables make the sushi visually appealing!
My journey into making sushi started when I wanted to create healthier meals for my family. We experimented with various fillings, but what really clicked were the colorful vegetables. I love adding vibrant carrots, cucumber, and bell peppers, giving our rolls a cheerful appearance that makes everyone excited to eat. Preparing these rolls has become a delightful ritual in our kitchen.
One essential tip I learned is to use a bamboo mat for rolling; it makes everything easier and ensures that the rolls are tightly packed without falling apart. I also recommend letting the sushi rice cool a bit before handling, as it’s easier to work with when it’s not scorching hot. Enjoying these Healthy Lunch Vegetable Sushi Rolls has truly transformed our lunch experience!
Why You'll Love This Recipe
- Packed with fresh, colorful vegetables for a healthy meal
- Customizable with your favorite fillings for endless variety
- Fun and engaging to make, perfect for family cooking time
Understanding Sushi Rice
Getting the sushi rice just right is crucial for the perfect roll. Make sure to rinse the rice until the water is clear to remove excess starch, which can make the rice gummy. When cooking, it's important to bring the water to a full boil before reducing the heat; this initial step helps to achieve fluffy grains. Allowing it to rest after cooking enables the moisture to redistribute, giving the rice a nice sticky texture that's ideal for rolling.
Another key element is the seasoning mix of rice vinegar, sugar, and salt. This not only adds flavor but also helps to create that glossy finish on the rice when incorporated. I recommend tasting a small grain after mixing to get the balance just right; some may prefer a touch more sweetness or tang based on personal preference. This seasoning enhances the overall sushi experience, making the rolls exciting and satisfying.
Assembling Perfect Rolls
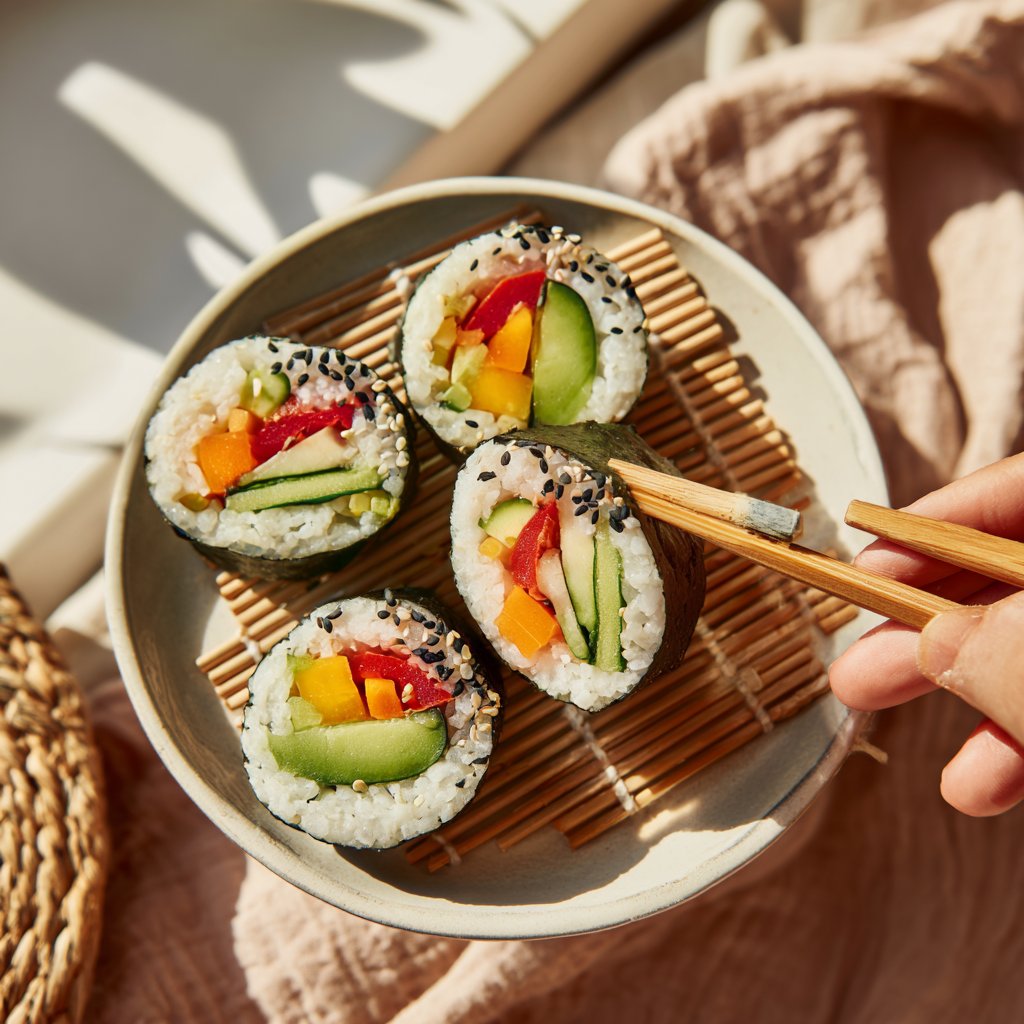
When assembling your sushi rolls, don’t overload on fillings; a thin layer of sushi rice with a few well-placed vegetables is ideal. Too much filling can make rolling difficult and may cause the roll to fall apart. Consider using a bamboo mat for an even roll; the snugness helps compress the ingredients, allowing for a firm sushi roll that holds together when sliced. Keep a small bowl of water handy to wet your fingers while handling the rice to prevent sticking.
After rolling, let the sushi sit seam-side down for a few moments before cutting. This helps the nori seal better around the roll. Use a sharp knife, ideally wet, to slice through the roll for clean edges. When slicing, a gentle sawing motion rather than pressing down too hard will yield prettier pieces and keep them intact. Each piece should ideally be about 1-inch thick; this size is perfect for dipping in soy sauce and enhances the overall eating experience.
Ingredients
Ingredients
Sushi Ingredients
- 2 cups sushi rice
- 2 1/2 cups water
- 2 tablespoons rice vinegar
- 2 teaspoons sugar
- 1 teaspoon salt
- Nori sheets
- 1/2 cucumber, julienned
- 1 carrot, julienned
- 1 bell pepper, thinly sliced
- Avocado slices
- Soy sauce for serving
Feel free to substitute or add your favorite ingredients!
Instructions
Instructions
Prepare Sushi Rice
Rinse the sushi rice under cold water until the water runs clear. Combine the rinsed rice and water in a saucepan and bring to a boil. Once boiling, reduce heat to low, cover, and simmer for 18 minutes. Remove from heat and let it stand covered for an additional 10 minutes.
Season the Rice
In a small bowl, mix the rice vinegar, sugar, and salt until dissolved. Gently fold the mixture into the cooked rice and let it cool to room temperature.
Assemble the Rolls
Place a nori sheet on a bamboo mat, shiny side down. Spread a thin layer of sushi rice over the nori, leaving a small border at the top. Arrange the vegetables horizontally across the rice. Starting from the bottom, roll the sushi tightly using the mat, sealing the edge with a little water.
Slice and Serve
Using a sharp knife, slice the sushi rolls into bite-sized pieces. Serve with soy sauce for dipping and enjoy!
Enjoy your healthy and delicious sushi rolls!
Pro Tips
- Experiment with different vegetables or add protein like tofu for a more filling meal. Keep your knife wet when slicing the rolls to prevent sticking.
Ingredient Substitutions
If you’re looking for a gluten-free option, swap soy sauce for tamari, which has a similar flavor profile but is wheat-free. Alternatively, coconut aminos can be used for a soy sauce alternative that's slightly sweeter and has less sodium. For those who want a different flavor dimension, consider adding sesame oil to your rice seasoning; it gives a nutty undertone that complements the veggies beautifully.
You can also mix up the vegetable fillings to suit your tastes or what’s available. Thin slices of zucchini, bell peppers, or even sprouts can make excellent additions. If you’re a fan of protein, consider adding cooked shrimp or tofu for extra nourishment. Feel free to get creative; the more colorful, the better!
Make-Ahead and Storage Tips
These sushi rolls can be made ahead of time, which is perfect for meal prepping. Once assembled, wrap the rolls tightly in plastic wrap and store them in the refrigerator for up to 24 hours. This helps to maintain their shape and freshness. However, for the best texture, it’s ideal to consume them within a few hours of making them, as the nori will start to soften over time.
If you have leftover sushi rice, store it in an airtight container at room temperature for up to a day. Reheating it in the microwave may dry it out, so add a splash of water to replenish moisture. You can also repurpose leftover ingredients into a salad or rice bowl instead of directly reheating sushi rolls.
Questions About Recipes
→ Can I use brown rice instead of sushi rice?
Yes, but the texture and flavor will differ. Brown rice requires longer cooking time.
→ How can I make these rolls gluten-free?
Use gluten-free soy sauce and ensure your rice vinegar doesn’t contain gluten.
→ What's the best way to store leftover rolls?
Wrap them tightly in plastic wrap and store in the refrigerator for up to 24 hours.
→ Can I add cooked ingredients like shrimp or chicken?
Absolutely! Just ensure they are properly cooled before assembling the rolls.
Healthy Lunch Vegetable Sushi Rolls
Created by: Aubrey Whitman
Recipe Type: Light & Balanced
Skill Level: Beginner
Final Quantity: 4 rolls
What You'll Need
Sushi Ingredients
- 2 cups sushi rice
- 2 1/2 cups water
- 2 tablespoons rice vinegar
- 2 teaspoons sugar
- 1 teaspoon salt
- Nori sheets
- 1/2 cucumber, julienned
- 1 carrot, julienned
- 1 bell pepper, thinly sliced
- Avocado slices
- Soy sauce for serving
How-To Steps
Rinse the sushi rice under cold water until the water runs clear. Combine the rinsed rice and water in a saucepan and bring to a boil. Once boiling, reduce heat to low, cover, and simmer for 18 minutes. Remove from heat and let it stand covered for an additional 10 minutes.
In a small bowl, mix the rice vinegar, sugar, and salt until dissolved. Gently fold the mixture into the cooked rice and let it cool to room temperature.
Place a nori sheet on a bamboo mat, shiny side down. Spread a thin layer of sushi rice over the nori, leaving a small border at the top. Arrange the vegetables horizontally across the rice. Starting from the bottom, roll the sushi tightly using the mat, sealing the edge with a little water.
Using a sharp knife, slice the sushi rolls into bite-sized pieces. Serve with soy sauce for dipping and enjoy!
Extra Tips
- Experiment with different vegetables or add protein like tofu for a more filling meal. Keep your knife wet when slicing the rolls to prevent sticking.
Nutritional Breakdown (Per Serving)
- Calories: 220 kcal
- Total Fat: 2g
- Saturated Fat: 0g
- Cholesterol: 0mg
- Sodium: 85mg
- Total Carbohydrates: 45g
- Dietary Fiber: 4g
- Sugars: 1g
- Protein: 6g